
<> DESCRIPTION <>
In this post, I will show you how to mod PPSSPP v1.3 (for v1.2.2 or older, go here) and change the textures of it. First of all, thanks to けん ブレードハート who informed me about the update in v1.3, also all member in PPSSPP forums who helped in the development of PPSSPP.
So, in this tutorial, I will use Gods Eater Burst for the game, but please note that this tutorial will also work for other PSP games too. So far, we haven't found any PSP games that doesn't work with this method.
So, in this tutorial, I will use Gods Eater Burst for the game, but please note that this tutorial will also work for other PSP games too. So far, we haven't found any PSP games that doesn't work with this method.

<> REQUIRED STUFFS <>
- PPSSPP v1.3 emulator (Link)
- GIMP or Photoshop (I recommend to use GIMP tho, it's much easier, also open-source) (GIMP Link)
<> WHAT's the DIFFERENCE? <>
1. Unlike the previous method, you don't need to change the backend to Direct3D 9, it's also compatible with OpenGL. But still don't work for 64-bit version of PPSSPP.
2. It's far more easier than the previous since it doesn't need to change from RGB to BGR.
3. Now supports for Android version! :D Yay!
2. It's far more easier than the previous since it doesn't need to change from RGB to BGR.
3. Now supports for Android version! :D Yay!
<> LET's BEGIN! <>
PC Version :
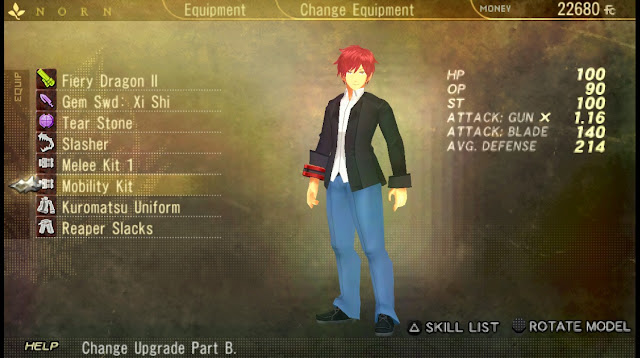
1. Go to a place in the game, where it contains the object that you want to export its textures and less objects you don't want to export. For example, I want to change the character's appearance. So, I go to the Character Preview. It will make it easier to find my character's textures when they're exported.

2. After that, save-state it.


1. Go to a place in the game, where it contains the object that you want to export its textures and less objects you don't want to export. For example, I want to change the character's appearance. So, I go to the Character Preview. It will make it easier to find my character's textures when they're exported.


3. Go to "Game Settings >> Tools >> Developer tools". And then at the Texture Replacement, tick the Save new textures.
4. Load-state the game. After you load-stated it, PPSSPP will dump all the textures at the current scene. Check the textures you dumped at "(installdir)\memstick\PSP\TEXTURES\ULUS10563\new".
*ULUS10563 is the game ID, it will be different for the other games

5. Delete the textures you don't want to edit, so it will save more space.
6. It's time for some editing! :D

7. At "(installdir)\memstick\PSP\TEXTURES\(gameID)", there should be a file named textures.ini. Open it, and below the [hashes], add hash codes of the textures you exported. They're on the filename of your textures.

8. Rename the texture files one-by-one and put the new filenames beside the hash codes.

9. Replace all the first 16 digits of the hash codes to zero. This will replace the other similar textures with different hashes in game.
10. Move all the edited textures from "(installdir)\memstick\PSP\TEXTURES\(gameID)\new" to "(installdir)\memstick\PSP\TEXTURES\(gameID)".

11. Save the ini file and start PPSSPP. Go to "Game Settings >> Tools >> Developer tools" and untick the Save new textures to prevent more dumping of the textures. Also tick the Replace textures so the original ones will be replaced.

11. Save the ini file and start PPSSPP. Go to "Game Settings >> Tools >> Developer tools" and untick the Save new textures to prevent more dumping of the textures. Also tick the Replace textures so the original ones will be replaced.

12. AND YOU'RE FINISH!!! Congrats, you're now a modder!

Android Version :
Actually it has the same method like the PC version. The difference is that the Android version dumps the textures at "sdcard\PSP\TEXTURES\(gameID)\new".
<> SUPPORT ME <>
Support me by clicking this link below and click "Skip Ad"


 and cha...)
Kalo edit "Text" nya gimana ? Ane kaga nemu teksturnya
ReplyDeleteUntuk edit teks di God Eater Burst bukan dengan ganti texture, melainkan edit langsung dengan hex Editor.
DeleteIni contoh hasil editing dialognya:
https://scontent-sin6-2.xx.fbcdn.net/v/t1.0-9/49061937_2473226542691009_5546277937193418752_n.jpg?_nc_cat=108&_nc_ht=scontent-sin6-2.xx&oh=994fcbf56633ee6e8112ba00b454c72d&oe=5CC73DC0
PC --> Notepad
ReplyDeleteAndroid --> ES File Editor
Itu saran saya
Cara supaya tahu kasih nama = 1_face.png gimana?
ReplyDelete"1_face.png" itu nama file tekstur yang kamu simpan
DeleteKalau kamu nyimpennya 2face.png ya isi "2face.png"
How do we know to put the name of = 1_face.png?
ReplyDeletebang, ada testure yang mukanya mirip Lenka Utsugi gak? muka, mata, rambut, sama baju dan weaponnya kalo bisa heheheeee minta tolong donk bang 😅
ReplyDeletedah masuk list gua sih dari dulu, tapi blm sempet sampe sekarang xD
Deletekalo udah ada kabarin ya bang hehehehee makasih
DeleteAfter finishing everything. Is it alright to delete the png files in the folder or does doing so revert the texture back?
ReplyDeleteNope, 'coz the pngs are actually resources. The system will only read the pngs, they won't import it into the iso nor anything else.
Deletesome question.
ReplyDeleteis it possible to make a big resolution? Ala HD?
Thx for ur tutorial, 'cause now I can make something great :)
ReplyDeleteIs it possible to make a Lenka Utsugi mod using these steps? How can i get a template that i want to use like for example Naruto's outfit?
ReplyDeleteGw kagak mengerti sama sekali
Deleteerr... im stuck around step 7 cause textures.ini dont showup.so im counfused a bit... using gimp edit and save. so did i miss some step?if you dont mind can you make some video.please..
ReplyDeletewhat about the resolution? can we for just resize it? like 64x64 to 128x128 or 512x512
ReplyDeleteBang, kalau kagak ada texture.ini nya gimana? Gw dari ppsspp android
ReplyDeleteBtw, game yg di mod bukan monster hunter tapi gundamvsgundam next plus, apakah beda juga ya, kalau gamenya lain?
DeleteI could never beleive that dumps 101 and 201 still exist until i met a guy from Las vegas,
ReplyDeletethat sold me legit dumps with pin and good balance on it, he gave me my First cashout.
before buying anything online,try get your tools ready..
he deal on drug shit too, you can check on him on telegram wether he is still in business
Telegram- @jayelx
This is the weirdest auto-promotion I had ever seen.
DeleteBang kok ane gak berselang lama texturenya malah balik ke original lagi ya?
ReplyDelete